Drawing a route in the planner
With the planner you draw a route on the map in the dashboard, without needing a ready-made GPX file. Cyql follows the roads between the points you click, calculates the distance, the elevation and the riding time, and attaches the route to the ride as a GPX file. The planner is still in beta.
In this article
- What does the planner do?
- Who can use the planner?
- Drawing a route for a ride
- Adjusting the route with route preferences
- Viewing the elevation profile and the surface
- Changing a drawn route later
- Drawing a route in the GPX library
What does the planner do?
The planner is a map on which you click points. The first point is the start, the next one is the finish, and everything you click after that is placed in between. The planner finds the way between those points itself, using the preferences you set for the type of ride, the elevation and the surface.
Below the map you see what the route is at that moment: the distance, the metres up and down, the estimated moving time and the split between paved and unpaved roads. Once you are happy with it, Cyql saves the route as a GPX file and attaches it to the ride.
Who can use the planner?
The planner is part of the Pro package and up. In Free and Starter the button is not there. You use the planner where you manage a ride or a GPX, so you need a club administrator account.
Drawing a route for a ride
Step 1
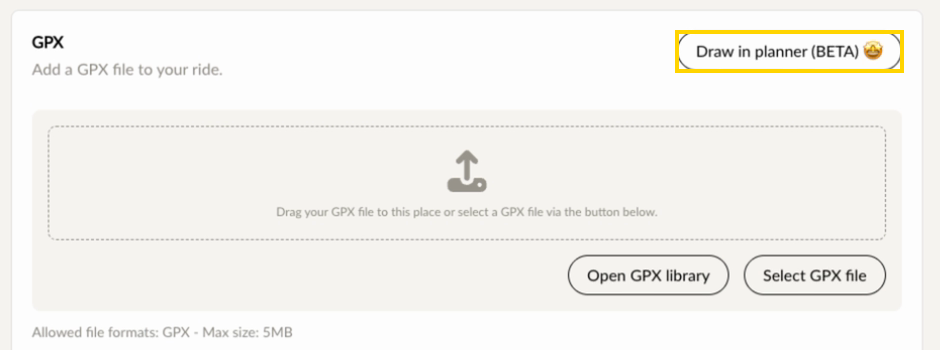
Open Rides in the menu and click Add ride, or open a ride that already exists. In the GPX block, click Draw in planner (BETA) in the top right.
Step 2
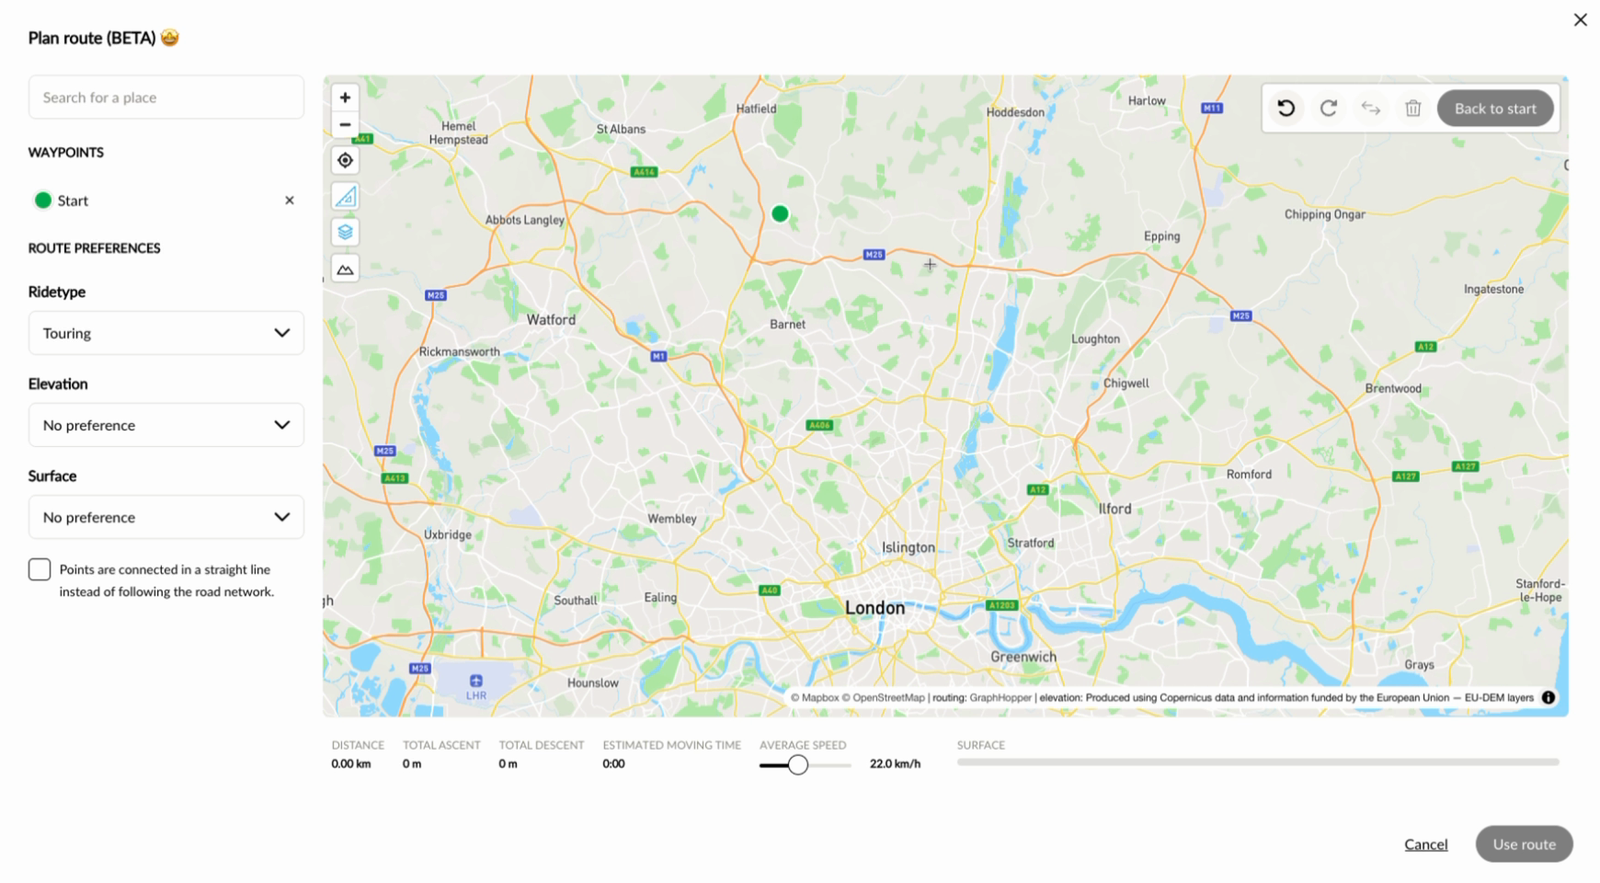
Type the place where the ride starts in the Search for a place field and pick it from the list. The map jumps to that place. Use the plus and minus buttons in the top left of the map to zoom in and out further.
Step 3
Click the point on the map where the ride starts. That point appears on the left under WAYPOINTS as Start.
Step 4
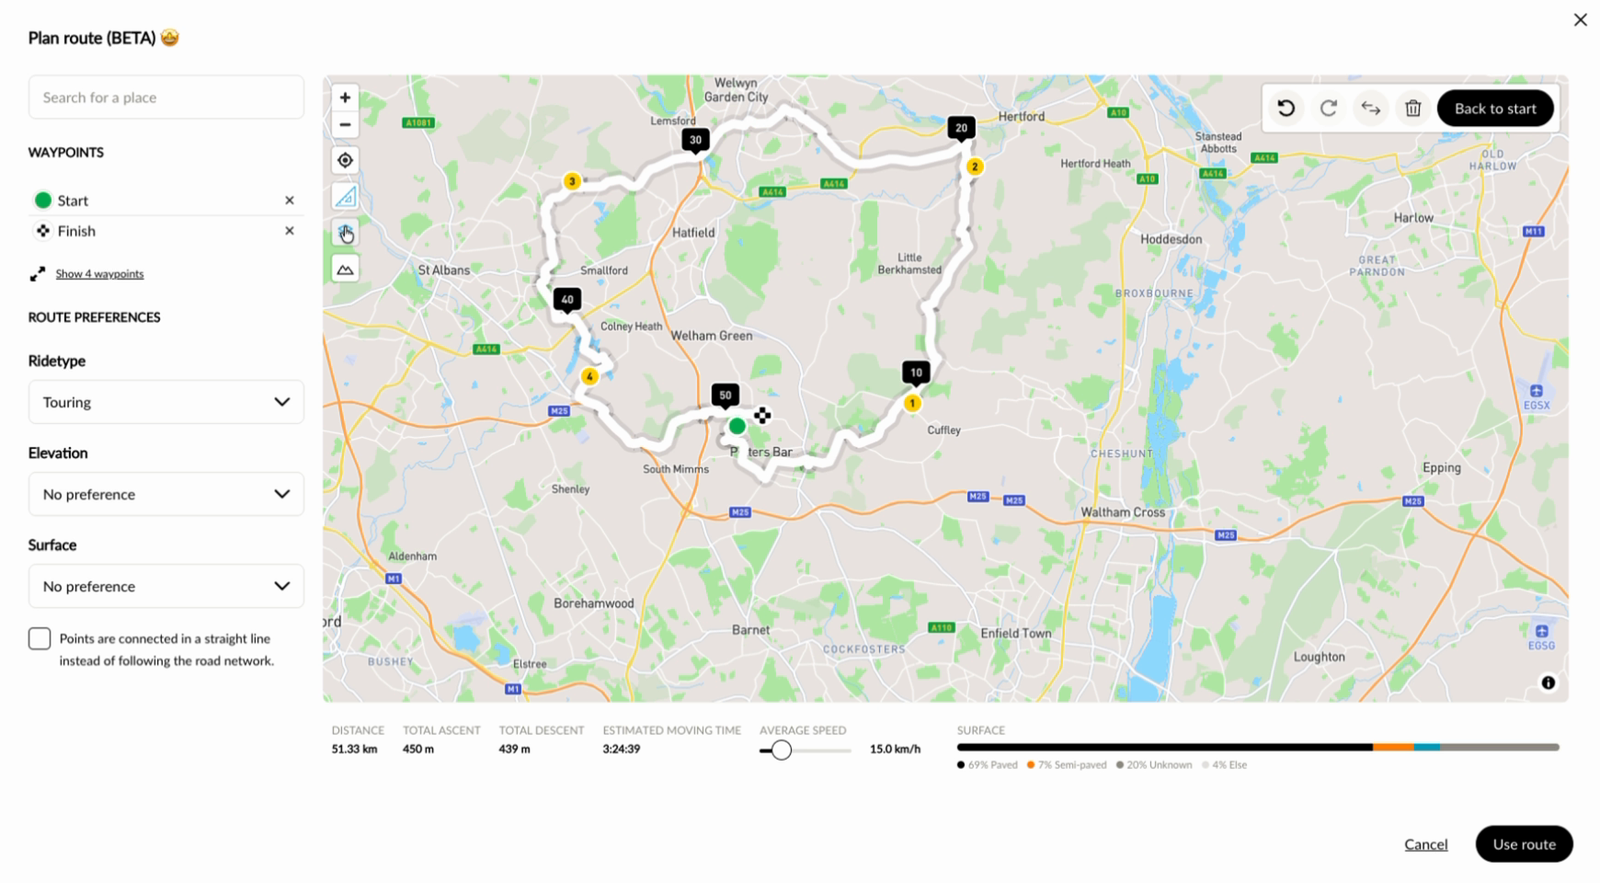
Click the next point. The planner draws the route along the roads to that point and calls it Finish. Every point you click after that is placed between the start and the finish; Show 4 waypoints expands those points in between. Below the map, DISTANCE, TOTAL ASCENT, TOTAL DESCENT and ESTIMATED MOVING TIME follow along straight away. For a loop, click Back to start: the route then returns to the point where you started, as in the example below.
Step 5
Click Use route in the bottom right.
Step 6
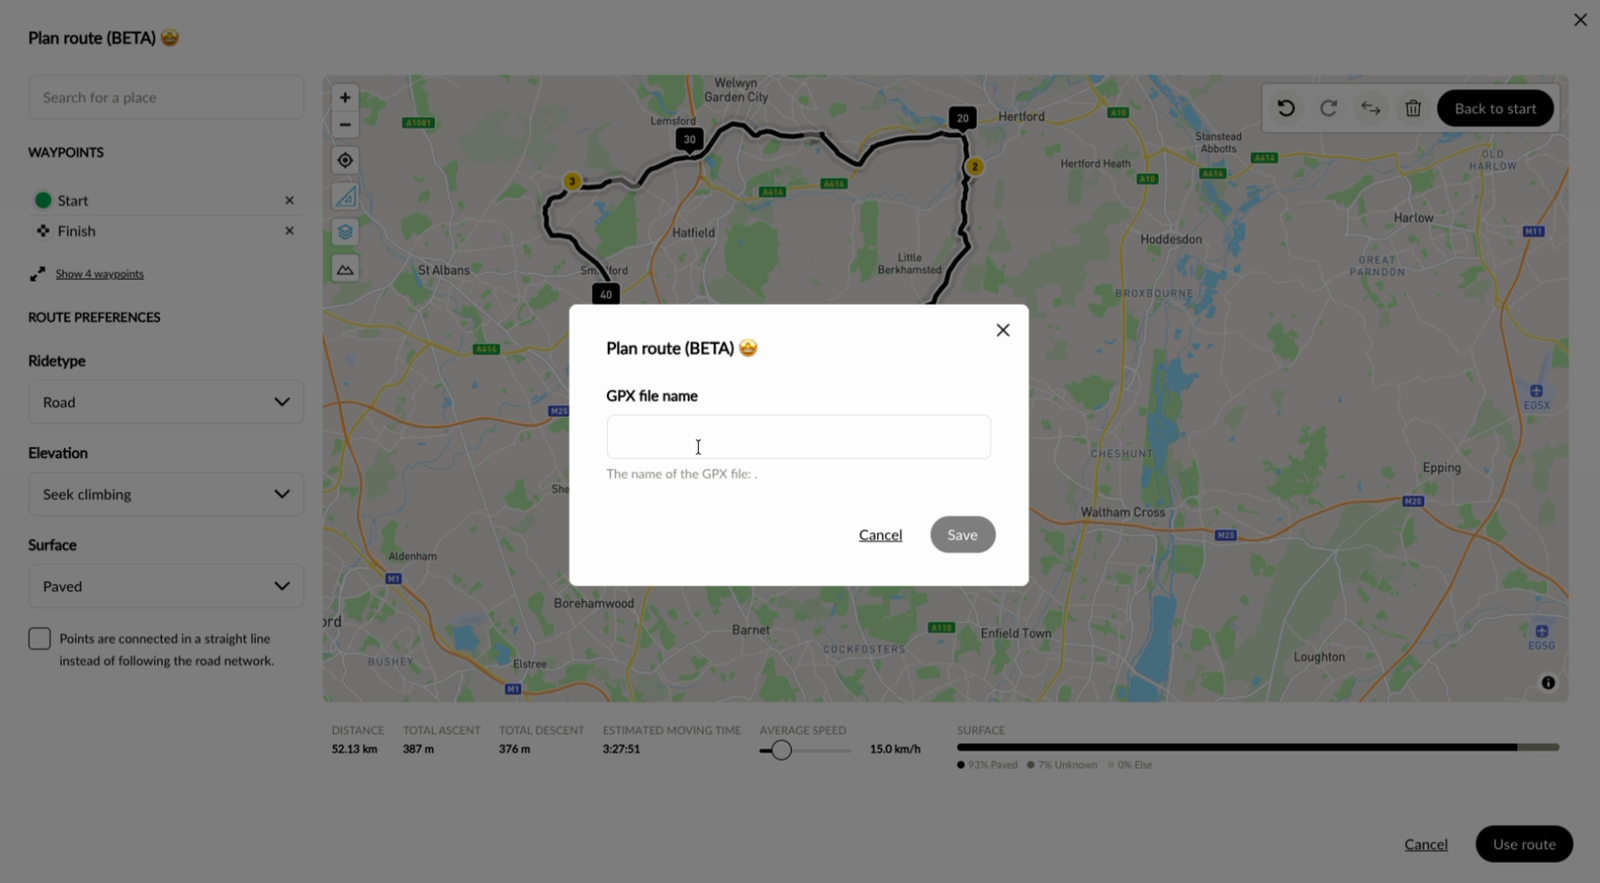
Give the GPX file a name and click Save. The route is attached to the ride under that name.
Step 7
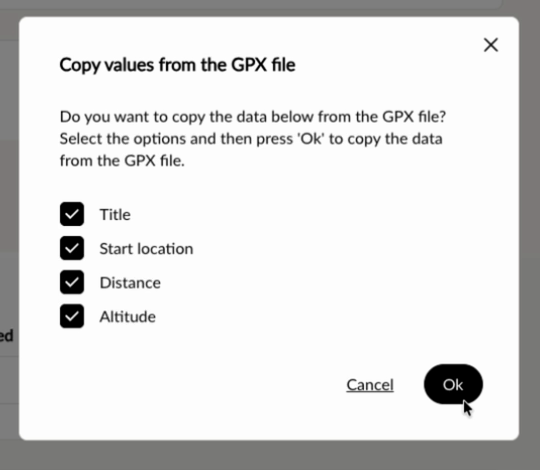
In Copy values from the GPX file, Cyql asks which data from the route may be copied into the ride. Tick what you want to copy and click Ok. You can choose from:
- Title: the name of the GPX file becomes the title of the ride.
- Start location: the starting point of the route becomes the start location of the ride.
- Distance: the distance of the route.
- Altitude: the elevation of the route.
Step 8
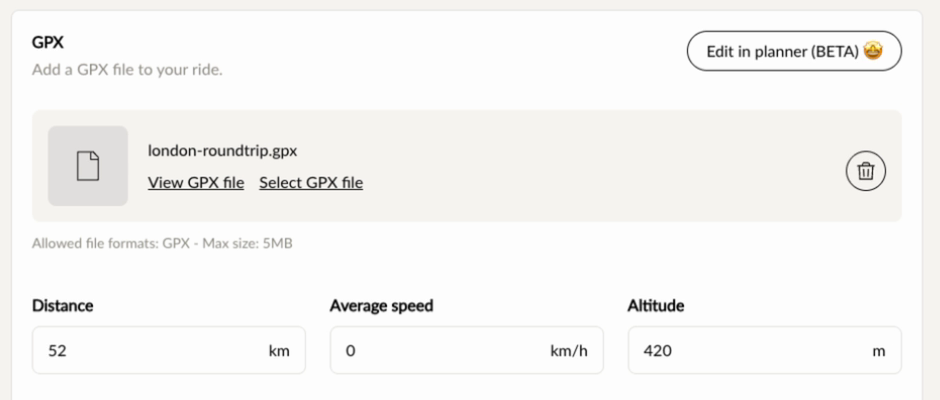
The route is now attached to the ride as a GPX file, with the fields you ticked filled in. Save the ride as you normally would.
Adjusting the route with route preferences
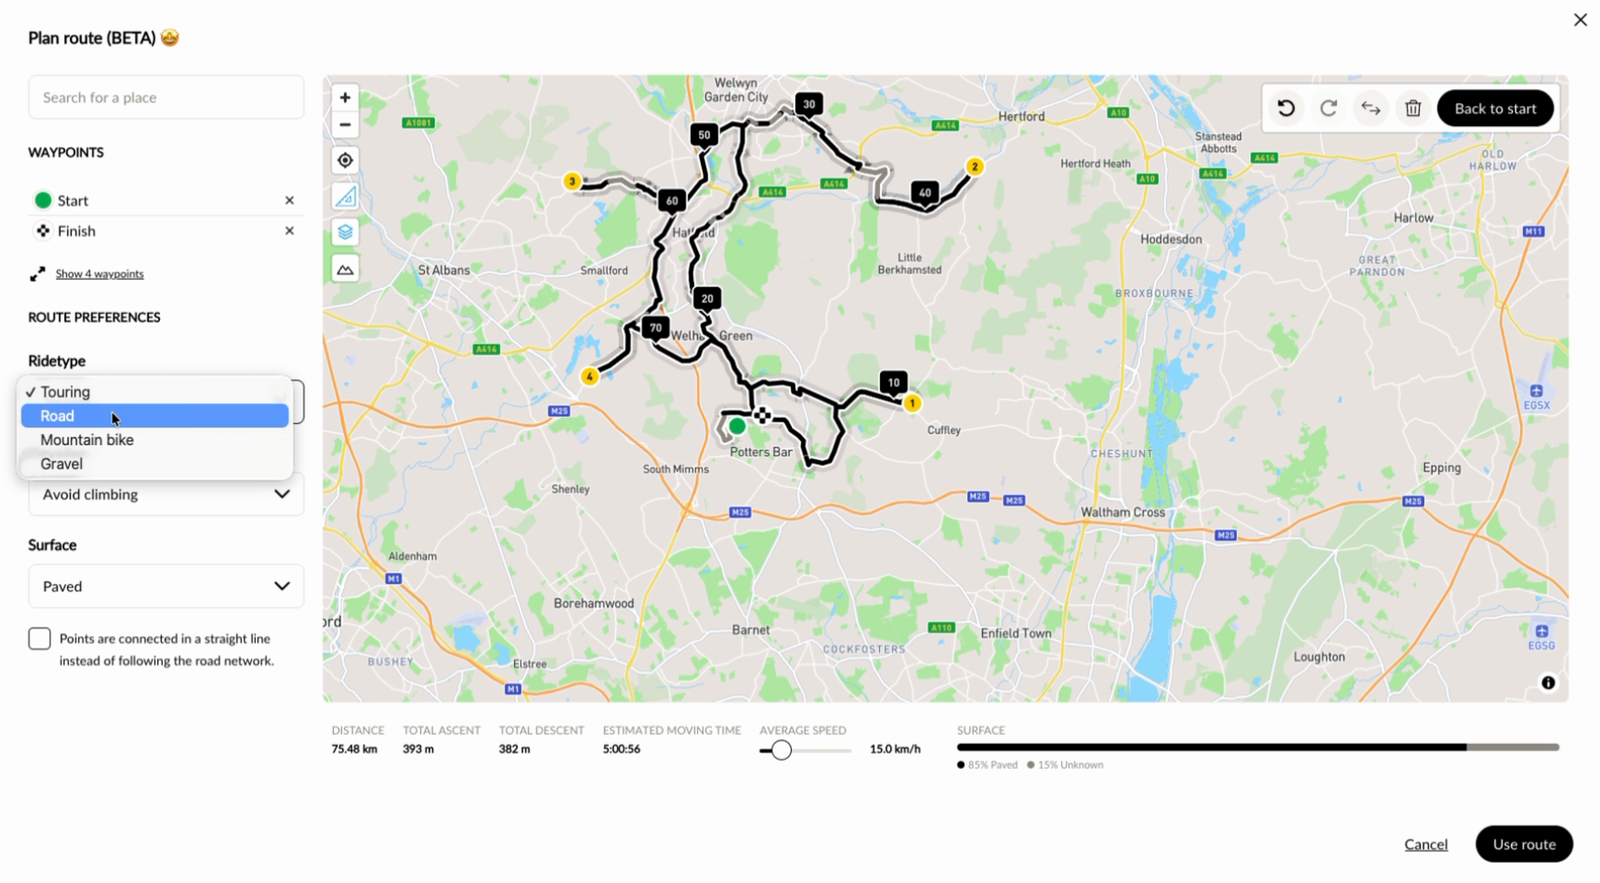
To the left of the map, ROUTE PREFERENCES decides how the planner finds the way. If you change a preference, it recalculates the whole route. You can do that at any moment, also when the route is already finished.
- Ridetype: Touring, Road, Mountain bike or Gravel.
- Elevation: No preference, Avoid climbing or Seek climbing.
- Surface: No preference, Paved or Unpaved.
If you tick Points are connected in a straight line instead of following the road network, the planner does not follow the roads but draws straight lines between the points.
The slider at AVERAGE SPEED sets the speed the planner uses to calculate the moving time.
In the top right of the map there are four buttons: undo a click, redo it, reverse the route so that the starting point and the end point swap, and throw away the whole route. You remove a single point with the cross behind its line under WAYPOINTS.
Viewing the elevation profile and the surface
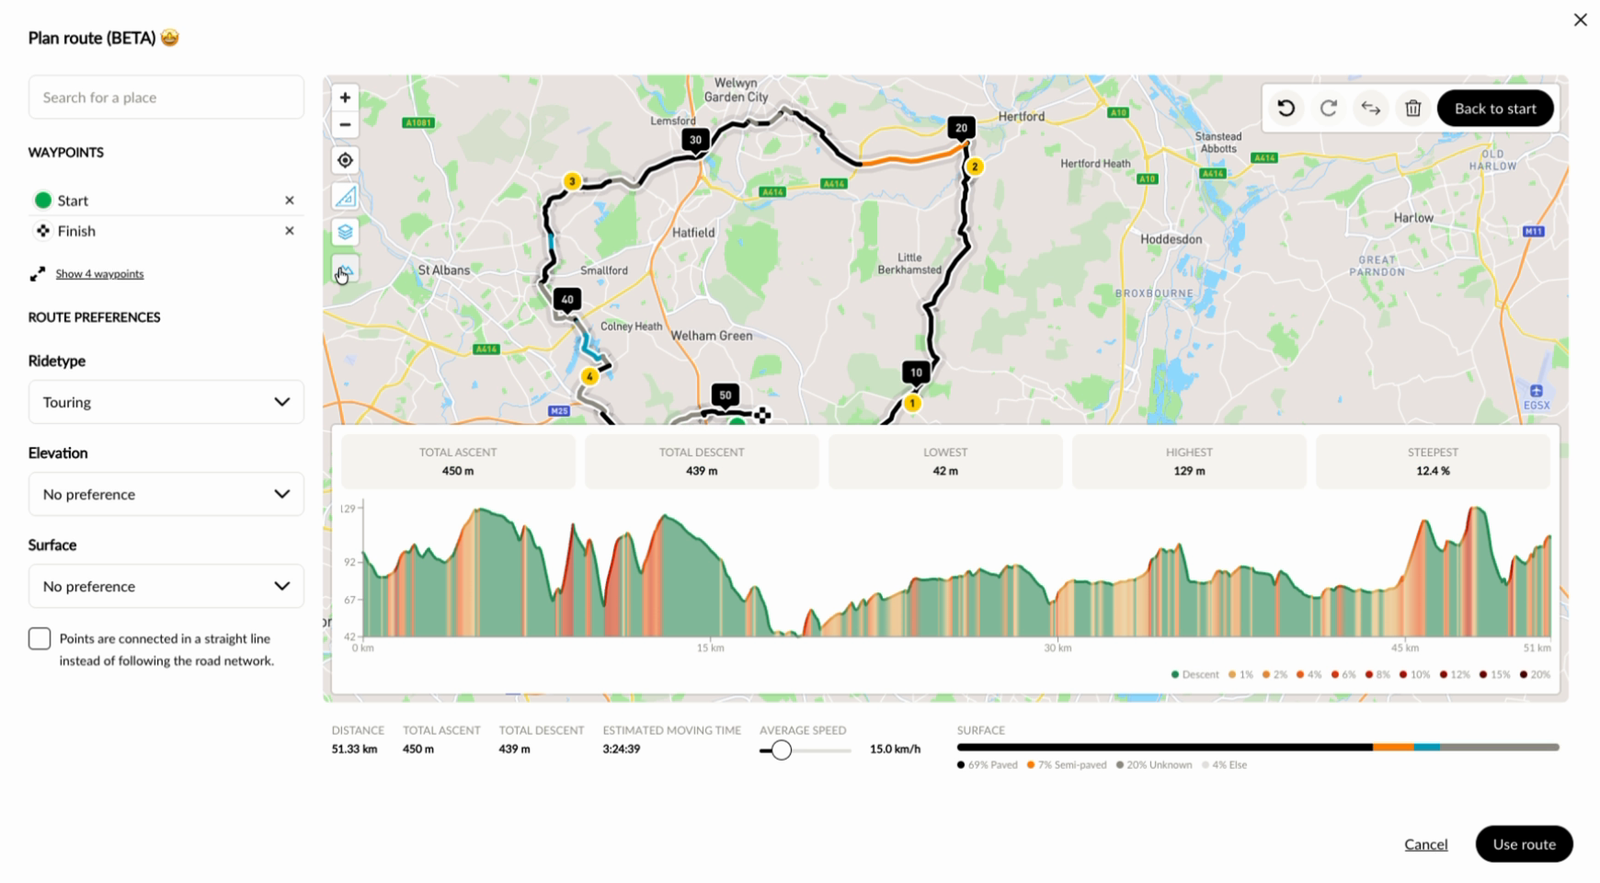
The bottom button on the left of the map opens the elevation profile. Above it you see the total ascent and descent, the lowest and the highest point and the steepest part, and the graph shows how steep each part is.
Below the map, SURFACE shows how the route is split between paved and unpaved roads. For part of the roads the surface is not known; that part is listed separately.
Changing a drawn route later
Once a route is attached to the ride, the button in the GPX block opens the same planner with this route in it, so you can add or remove points and change the preferences. The button is then called Edit in planner (BETA) instead of Draw in planner (BETA).
Drawing a route in the GPX library
The planner is not only available for a ride, but also in the GPX library. It works exactly the same there: you draw the route in the same way and save it as a GPX file.
Was this article helpful?
That’s Great!
Thank you for your feedback
Sorry! We couldn't be helpful
Thank you for your feedback
Feedback sent
We appreciate your effort and will try to fix the article